First, a trip to Radio Shack! Here are the parts I had to get:
-Size M coaxial DC power plug (part #274-1569)
-Size M coaxial DC panel mount power jack (part #274-1563)
-4 RCA jacks
-4 Shielded phono jacks (panel mount) (part #274-0346)
You will also need a Dew-Not dew controller, a solder gun and solder as well as a set of alan wrenches and a small flat-head & phillips screw driver. A Dremel sanding tool (or sand paper), and a Drill. Small wooden or plastic dowels are helpful to keep the circuit panel in place but not a necessity.
Next you need to disassemble your Dew-Not controller and take out the circuit board, use your small flat-head screwdriver to take off the adjustor knobs - keep them handy for later :
Now take off the panel for your fork arm with the handle with the Alan-wrench set. There are two screws on the handle and four on the inside corners of the fork-arm. The cover will come off easily.
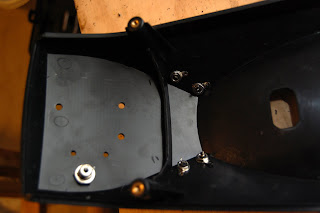
Next you will need to drill the appropriate holes in the fork arm cover. Use the circuit board to determine exactly where. You will need 2 for the temperature knobs and 3 for the lights. Don't make them too big else it will allow movement in the board which could pull wires loose. After you have the circuit board able to fit in the cover you can determine where to drill the holes for the power plug and the RCA jacks. I found with the circuit board, space was tight so the RCA jacks are on the sides rather than the front face, and my power jack is to the right of the temperature knobs. Once you decide where, drill those holes and attach the appropriate jacks.

Next I decided to cut the wooden dowels to help keep the circuit board stable on the left side (looking from the inside) ... the right side will be held by the temp. knobs. I put the circuit board in and decided how long to cut them then used the small silver circuit board screws that were used in the Dew-Not box to put the dowels on the board. At the same time I used the Dremel sanding tool to sand the ridge down on the cover so that the RCA jacks wouldnt raise up the circuit board.
(the wooden dowels are on the bottom edge)
Now its time to solder! Put the circuit board in place and affix the temp. knobs so it will hold in place and then solder on your RCA wires and your power wires.
Before you attach it back to the scope, test it out. I used my Starizona power pack to make sure it worked as I havent attached the Size M coaxial power plug to the wire yet. Once you are sure all the connections work, attach your fork-arm cover back to the scope and you are done!!!


Mine came with the cigarette lighter adapter too, there are a few options, after you cut the wires you can always solder the proper size M male plug onto what is left, but I found that it was a short cord to begin with, so I just bought a 12V (I think it was 4amp, but check the dew controller before you buy it) cord from radio shack that you could buy different end pieces for and just got a size M plug for it.
ReplyDelete-Anna
i really like your article. i enjoyed it. thanks a lot for sharing. looking forward to more of your posts soon.
ReplyDelete